From Bland to Bold: A Mudroom Transformation with a $2 Kitchen Sponge
I know we've all been there: that awkward space in your home that's just... meh. For me, that was definitely my mudroom. For two years, it was a total beige-fest, with boring farmhouse lights and absolutely no personality. Not exactly the vibe I was going for being the color-loving person I am! I finally decided enough was enough, it was time to give this space the vibrant personality it deserved! There's more to this mudroom than meets the eye though. Not only is it the entry point from the garage, but it doubles as a high-traffic hub of our home. Think: Shoes flying off and on, sports equipment galore, coats everywhere, backpacks, and the occasional trip to the powder room. And let’s not forget the daily pilgrimage to the pantry, which might be a bit of a hike, but hey, it burns a few extra calories, right? So yeah, our mudroom gets a lot of use around this house!
With 3 energetic kids and a big playful dog, I had to make sure the room was functional and would withstand the daily dirt, dog hair, and general chaos of clutter it was already accustomed to.
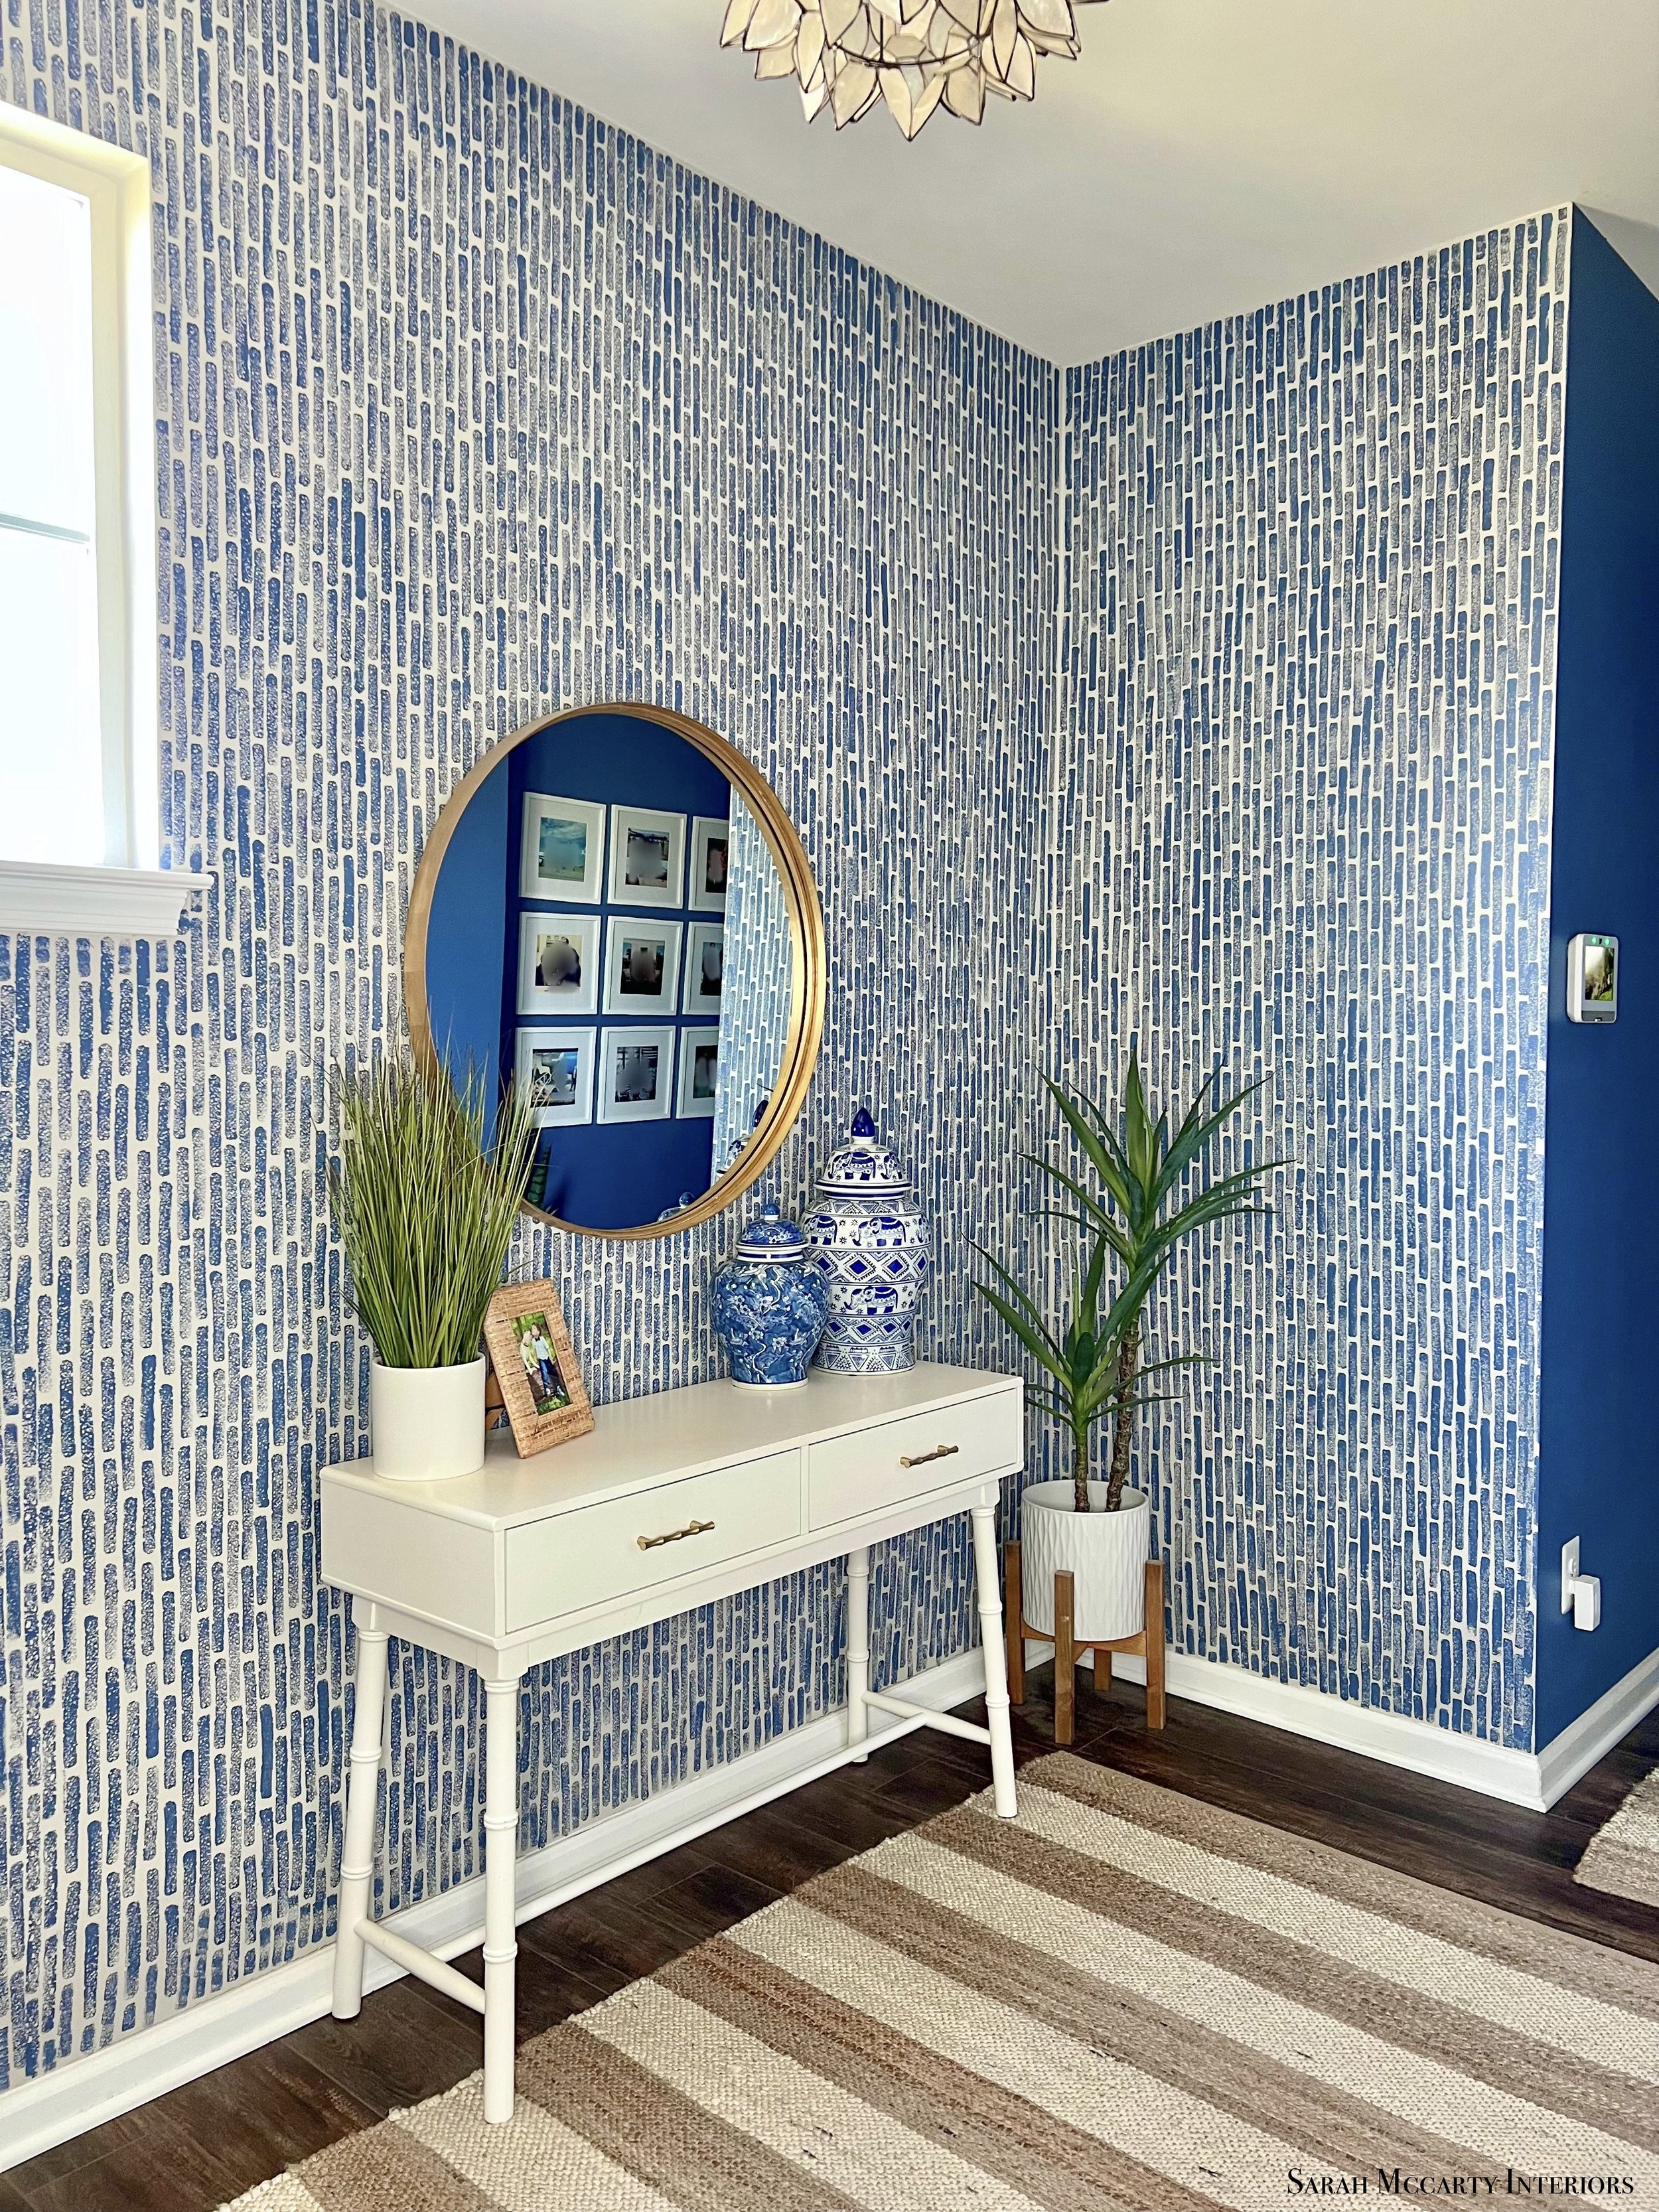
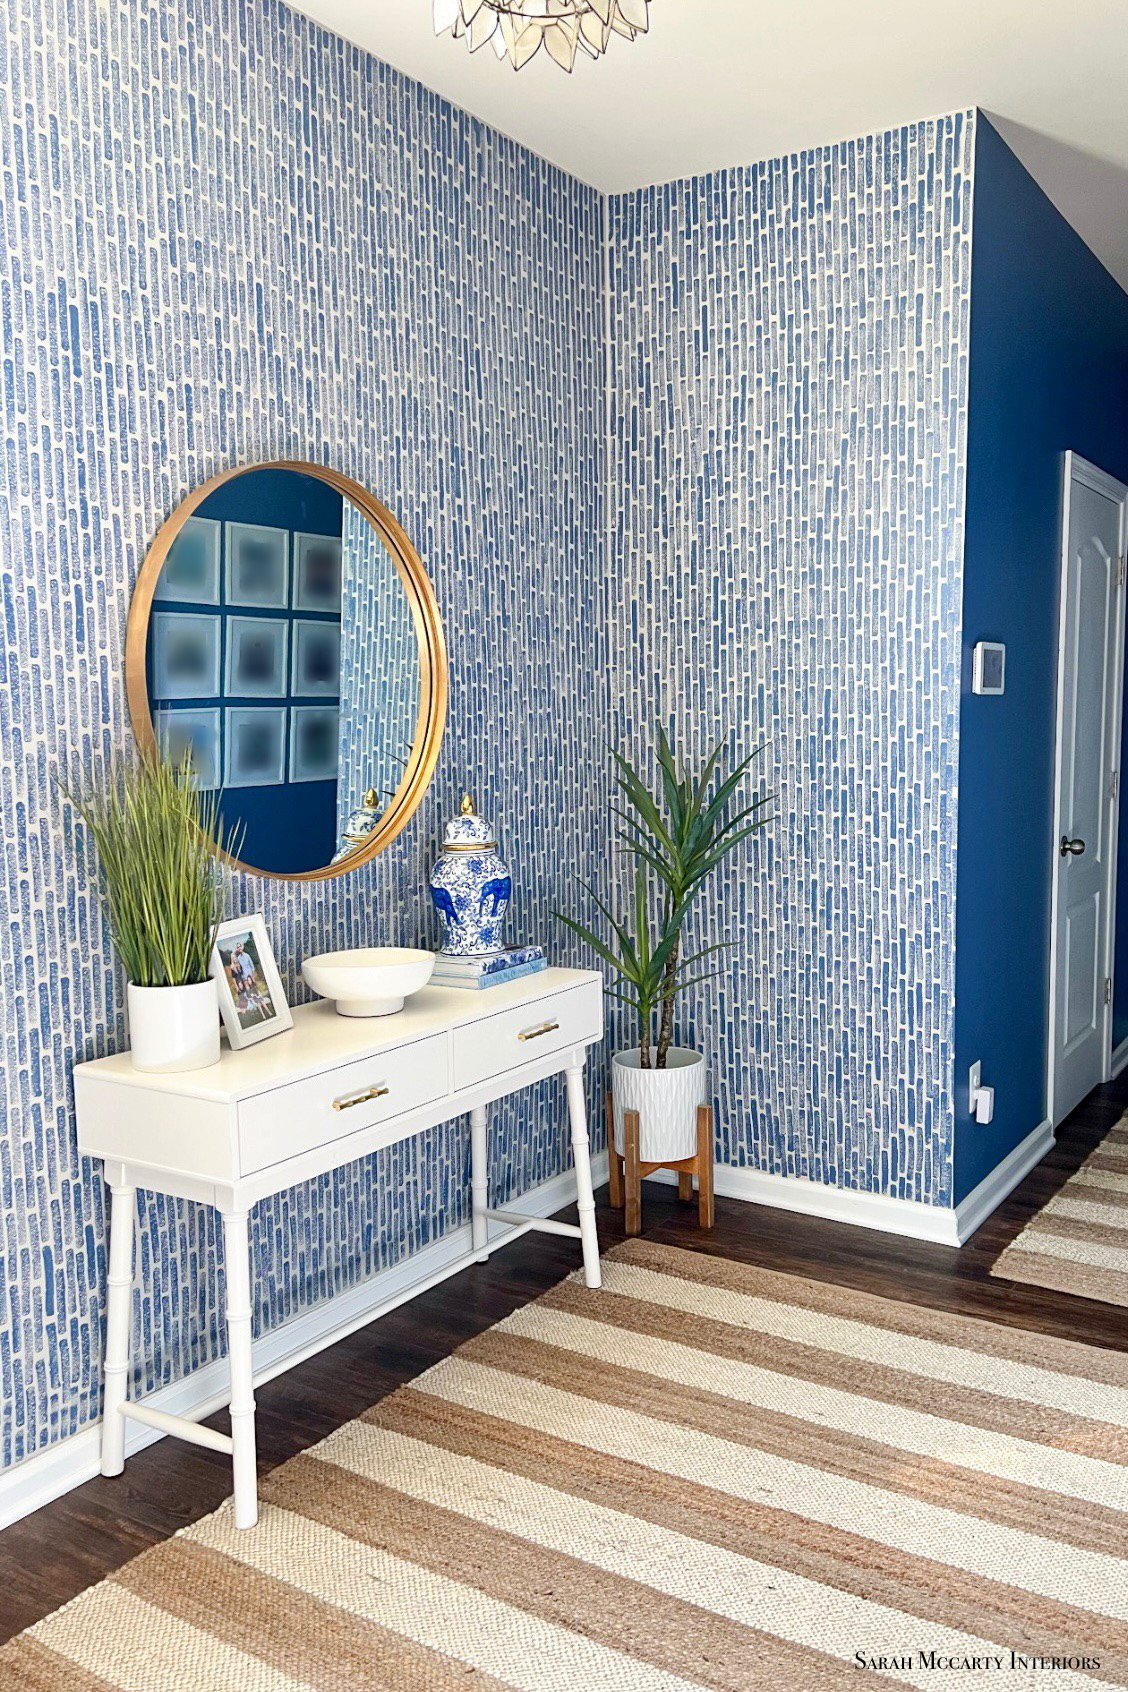
I kicked the project off by choosing the color scheme first - blue with hints of neutral and gold. Blue is my happy color. I’ve used it consistently throughout my home (as I’m sure you’ve noticed!). I really wanted to make this space pop so I chose a bolder shade of blue: “Denim” by Sherwin Williams. I knew it would bring the WOW factor and it did not disappoint!
Inspired by the vibrant blue paint color, I knew I wanted to use it to create an accent wall in the room. I was looking for something I could do right away. I guess I’m like a project-craving missile, an idea will pop into my head, and boom, it's happening immediately (my husband loves it so much, ha!) I had already done 3 hand-painted accent walls in my house using a kitchen sponge (I was on a bit of a #spongewallmovement kick!) so that immediately came to mind. I just needed to decide what pattern I wanted to do in this space.

To make a sponge accent wall, all you need is a $2 package of standard kitchen sponges, a paper plate, and same paint (leftover paint works too!). You may also need a step ladder and a level depending on your pattern, but overall it’s a pretty short supply list, and so much cheaper than doing wallpaper. I grabbed some paper to do a few sample patterns and prepared my sponge. (
Pro tip: I always trim the corners of my sponge so the print is softer looking and less rigid.)
I made a few sample patterns on the paper and taped them to the wall.
I decided to go with the vertical tile-looking pattern, knowing it would make the room feel taller, and would coordinate with other patterns in the room (like my striped rugs). And of course I had to choose the pattern that would be the most labor-intensive for me, ha ha!
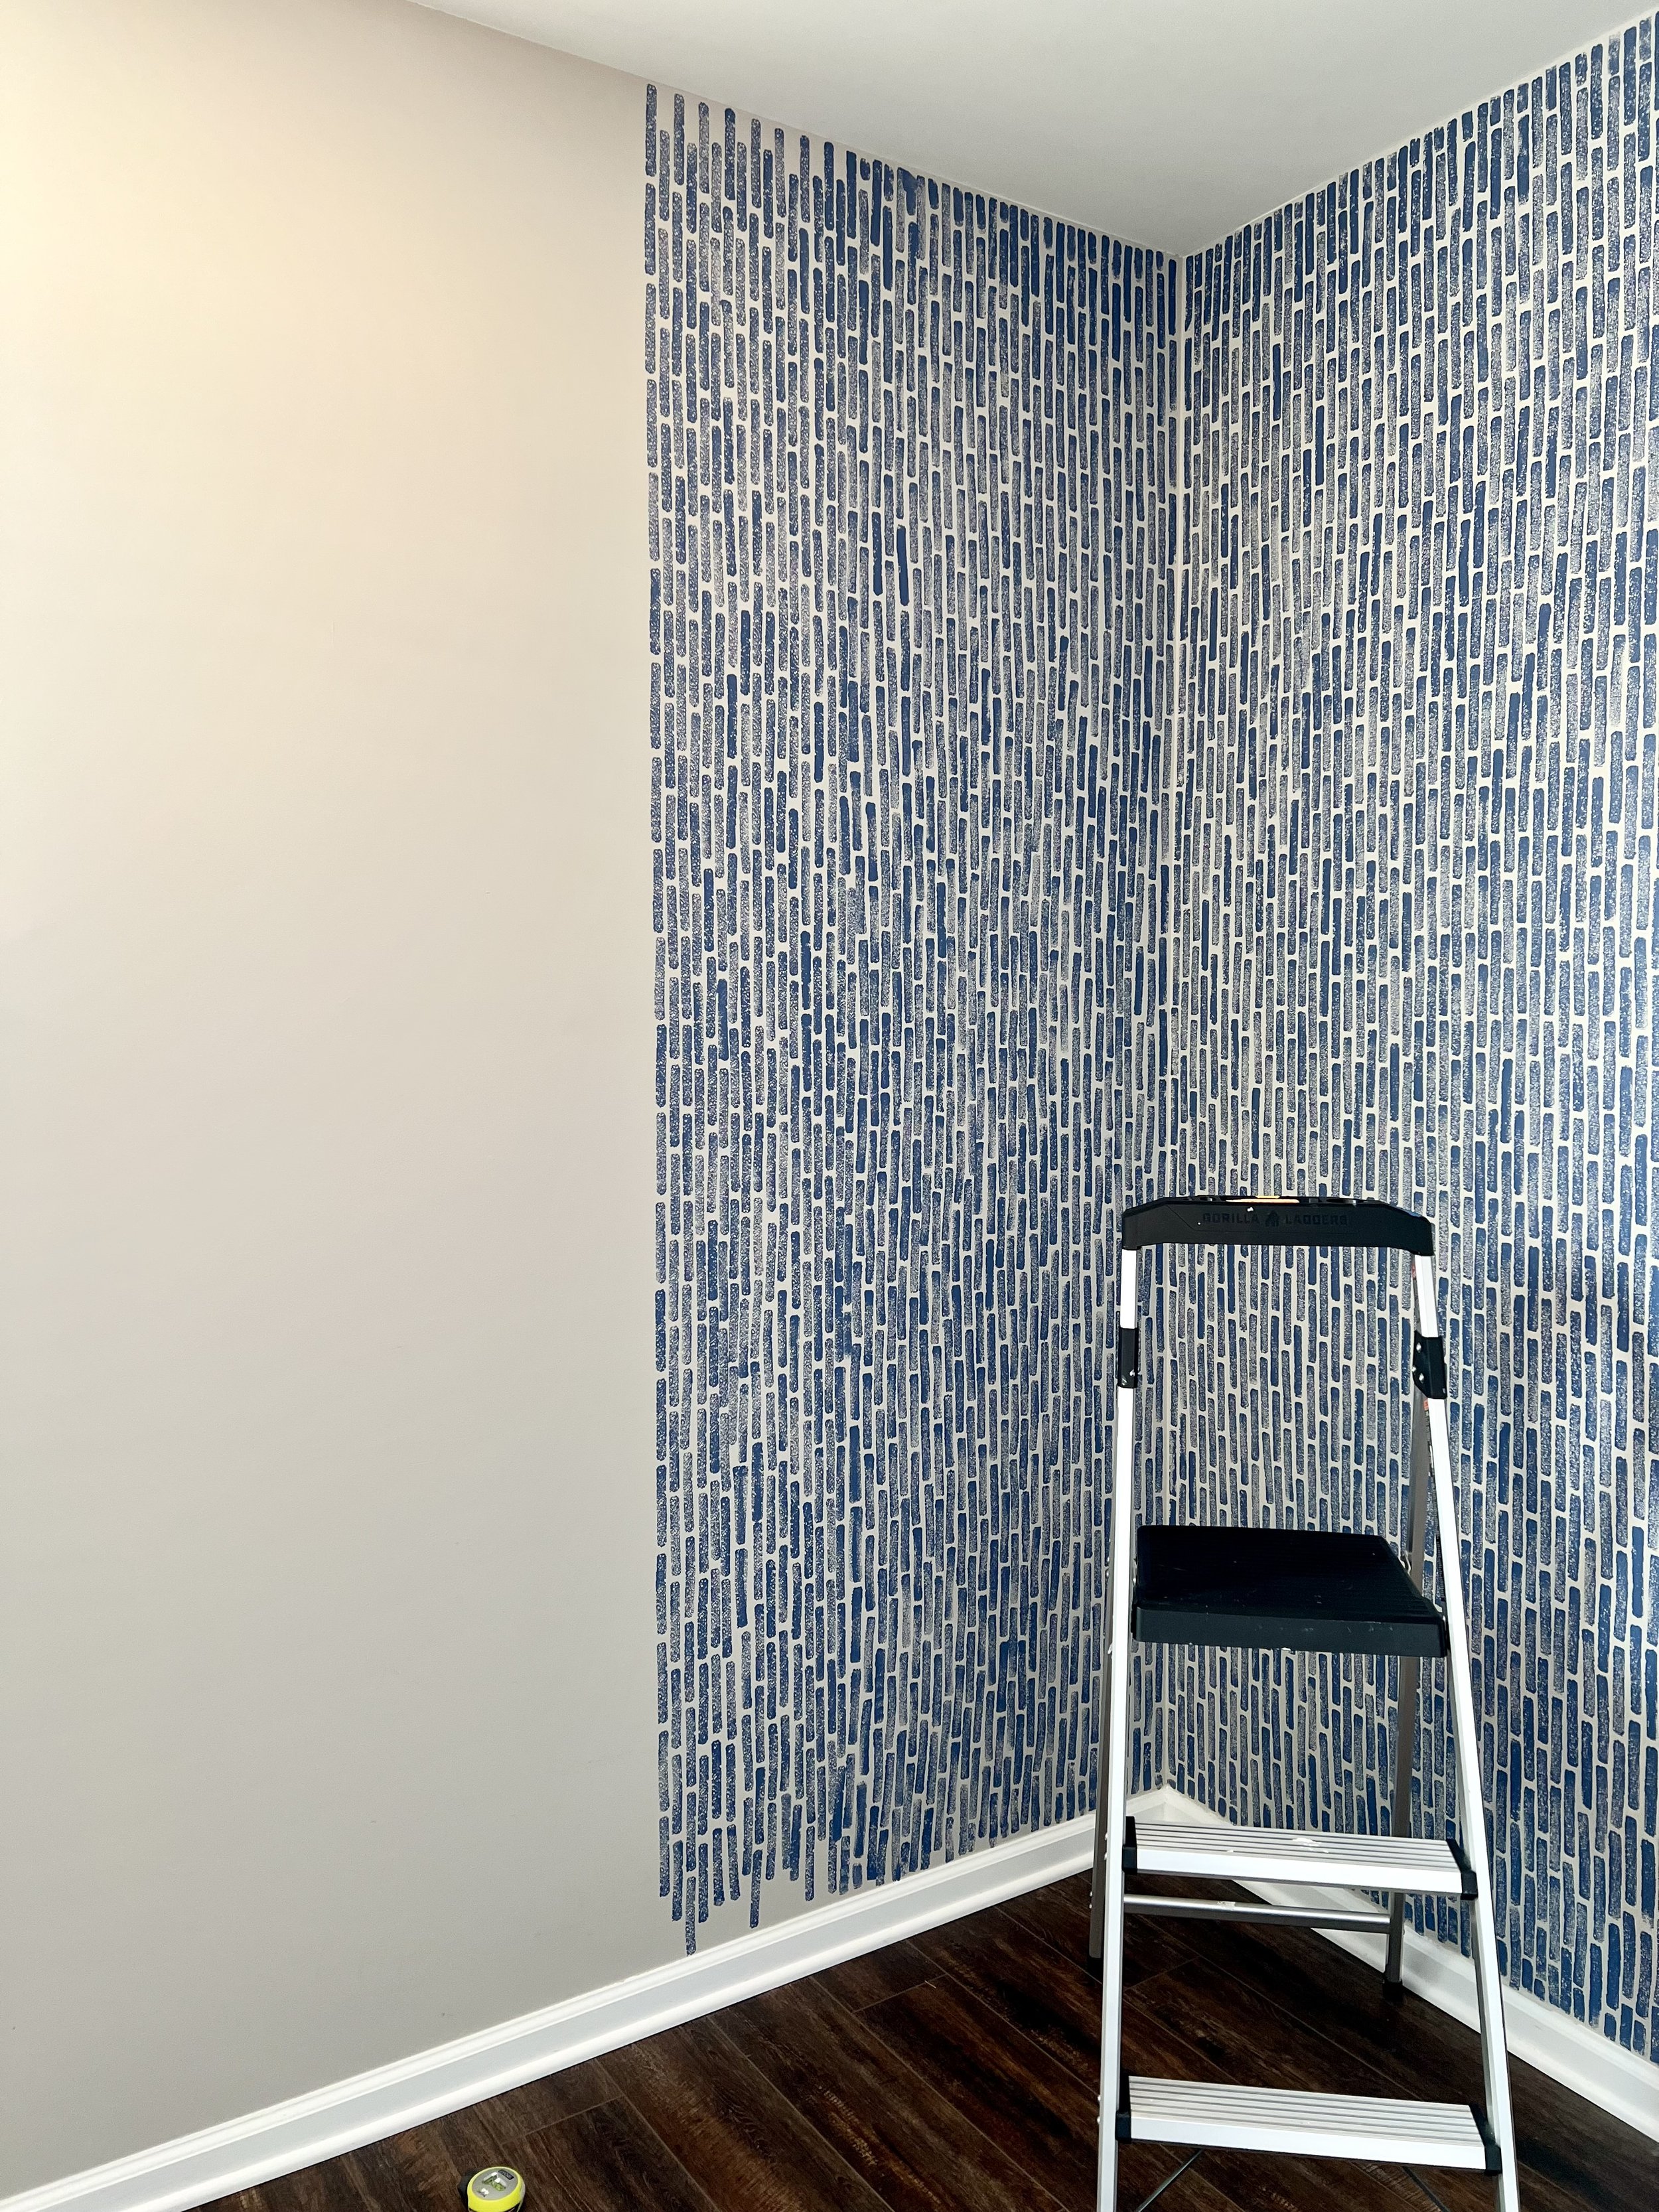
I got to work on the sponge wall right away. I started with the smaller wall and worked my way left to right. Then I tackled the bigger wall working right to left. I did the smaller wall freehand. I just lined up the columns as I went so the next one wouldn’t be crooked. When I started the bigger wall, and had to go right to left it was much harder to keep my columns straight. I couldn’t see where I was putting the sponge down (the sponge was literally blocking my view!). That was a big challenge. If I were to do it again, I’d go left to right the entire way. I ended up using a laser level for some of the bigger wall to help keep my columns straight. Once I got to the window, the laser level didn’t really work. That ended up being the trickiest part of the whole thing. I ended up re-painting the wall in that area to re-do a portion of it. Hey it happens to the best of us! After that I just went extra slow making sure the columns lined up.

It took me 2 days to do the 2 walls. I’m not the type to let a project sit (Type A over here!) so once I started it, there was no stopping until it was done. It was actually the most time-consuming sponge wall I’ve done thus far. It was totally worth it though. It really transformed the space. I’ve had numerous people think it was wallpaper and one person even thought it was actual tile. I’ll take that as a win!
Once all of the painting was done (my husband did the solid walls), it was time to add all the furnishings! I had already ordered everything so it would be ready to go as soon as the paint was dry. I originally had an old brown skinny console table with “X” sides sitting in here, not my vibe but it served its purpose at the time. I replaced it with a gorgeous white console that I found at Target. It has two drawers that are perfect for storing keys and sunglasses and beautiful gold drawer pulls to finish it off.

The gallery wall in the mudroom hallway was originally done with all black frames. To create more of a visual impact, I swapped the dark frames for crisp white ones to pop off the vibrant blue wall. And because no room is complete without a little greenery, I moved my existing faux floor plants back into the space. The striped rugs I grabbed off Wayfair. They add a nice touch of texture to the floor and so far they’ve held up well to both the vacuum and foot traffic.
We used to have a big calendar system from Pottery Barn on the wall over the old console. While I love keeping up with family commitments, I prefer having a mirror over the console for 2 reasons: 1) it reflects light and makes the space not only brighter but feel bigger and 2) it’s nice to be able to check appearances before walking out the door. The mirror was a bit more than I had planned to spend, but it’s amazing quality. I did try a cheaper mirror from a popular online vendor first, but the reflection was something out of a carnival funhouse. It wasn’t a good look!

The baskets in the built-in cubbies I had previously purchased for this space. They fit the cubbies perfectly! We keep our shoes in the bottom ones and winter gear up top. They’re great for keeping the clutter contained (and hidden).
One of my favorite changes to the space is the new lighting! We replaced the original glass and iron farmhouse lights (that came with our house) with STUNNING Capiz Lotus pendants from World Market.
If you’ve been eyeing these pendants from another well-known retailer, get these instead! They’re half the price, easy to install (according to my husband) and beyond beautiful!
The final touch to this mudroom transformation was the custom bench cushions. This room was long overdue for a comfy place to sit when putting your shoes on! I ordered theses custom cushions from Patio Lane and they were fantastic to work with! They sent me several fabric swatches to choose from (all Sunbrella fabrics - so they won’t fade over time) and I chose my favorite print. I gave them measurements and a template of my bench and in return they sent me two beautiful cushions!
And there you have it! My mudroom makeover is complete and I could not be more thrilled with the results! Check out the Before and Afters below!